
Charging base positioning is vital for proper Landroid functioning, here all the information to follow
Charging base installation
The charging station is where your Landroid goes to recharge its battery. It’s also the parking lot where it rests between mowing sessions.
General requirements
The general requirements you should consider when you plan to positioning the charging base are:
- within reach of AC mains (10m). Make sure the adaptor and the electrical socket are always kept in a dry area.
- in shade
- straight path on entrance; straight path on exit if necessary, depending on models
- no irrigation sprinklers nearby
- flat land. If the charging base is properly positioned, once Landroid sits there the contact pins of the mower will be in the middle of the pins of the charging base. This will ensure the best contact.
You can place the charging station on your lawn or on a hard surface like a walkway, provided that the lawn and the hard surface are at the same. height (no steps)
Depending on which Landroid model you have please refer to the following tutorials for some further slightly different requirements.
Landroid S, M, L LED display, LCD display and LCD display + knob: WR130E, WR139E, WR140, WR140E, WR141E, WR142E, WR143E, WR147, WR147E, WR147E.1, WR148E, WR149E, WR150, WR150E, WR153E, WR155, WR155E, WR165, WR165E, WR167E, WR184E
Specific requirements:
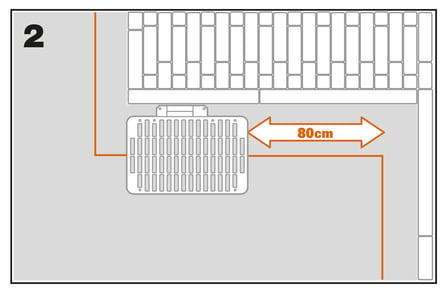
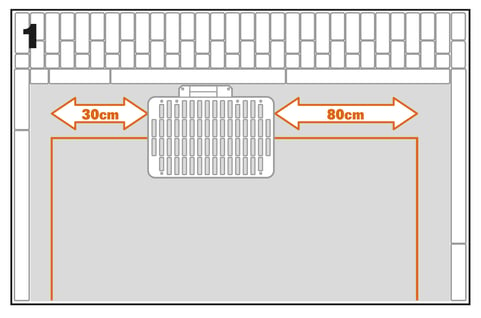
- 80cm straight path in front of charging base
- on the exit side, it needs at least 30cm straight path before a left turn (fig. 1).
If the turn is to the right, there is no need for a straight path (fig. 2)

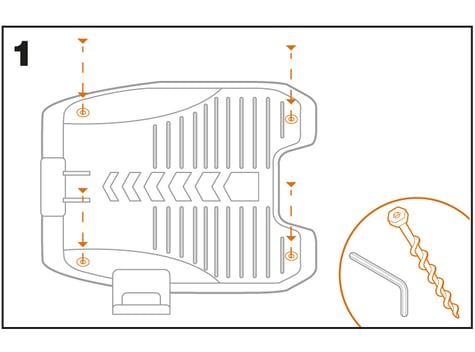
Fix the charging station to the selected location
• Secure the base to the ground by means of the supplied screws, using the supplied Allen key
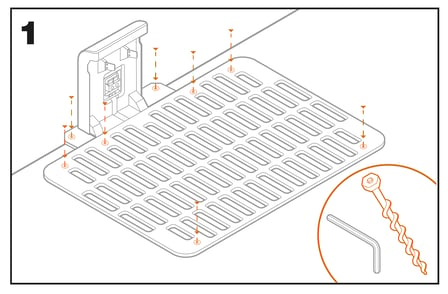
• If you position the base on hard surface, fix it with plug and screw fixings (not supplied)
If you need to continue with the installation please proceed with the following tutorial How to lay down the boundary wire
Landroid M, L 2016/2018: WG754E, WG755E, WG756E, WG757E, WG758E, WG790E.1, WG791E.1, WG792E.1, WG793E.1, WG796E.1, WG797E.1, WG798E, WG799E, WR111MI, WR112MI, WR113MI
Specific requirements:
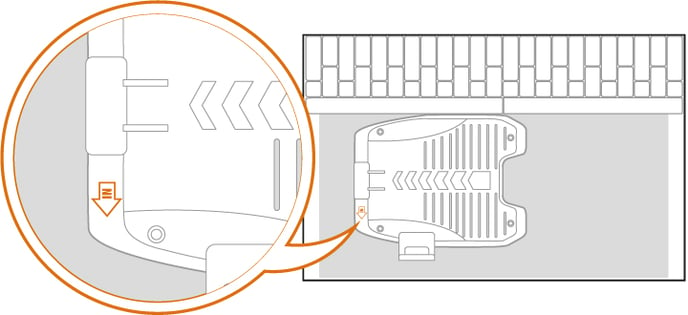
- The charging base should be placed with the “IN” arrow pointing to the lawn.
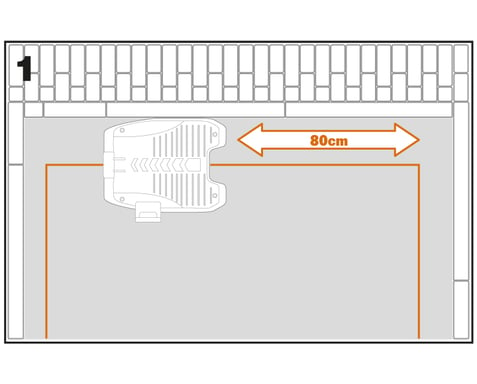
- Allow 80cm clearance on the entrance side
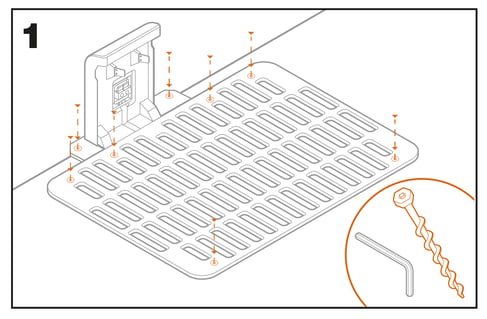
Fix the charging station to the selected location
• Secure the base to the ground by means of the supplied screws, using the supplied Allen key
• If you position the base on hard surface, fix it with plug and screw fixings (not supplied)
If you need to continue with the installation please proceed with the following tutorial How to lay down the boundary wire
Landroid S 2017/2018: WR090S, WR091S, WR092S, WR093S, WR094S, WR095S, WR096S, WR100SI, WR101SI, WR101SI.1, WR102SI, WR102SI.1, WR103SI, WR104SI, WR104SI.1, WR105SI, WR105SI.1, WR106SI, WR106SI.1, WR110MI, WR110MI.1, WR115M
Specific requirements:
- leave 80cm clearance on the entrance side
- leave 30cm clearance on the exit side
Fix the charging station to the selected location
• Secure the base to the ground by means of the supplied screws, using the supplied Allen key
• If you position the base on hard surface, fix it with plug and screw fixings (not supplied)
If you need to continue with the installation please proceed with the following tutorial How to lay down the boundary wire
Articles series:
- Landroid installation plan
- How to properly place the charging base?
- How to lay down the boundary wire
- How to connect Landroid to Wi-Fi