
This tutorial will help to set up the Multi-zone for Landroid M, L 2016/2018 models WG754E, WG755E, WG756E, WG757E, WG758E, WG790E.1, WG791E.1, WG792E.1, WG793E.1, WG796E.1, WG797E.1, WG798E, WG799E, WR111MI, WR112MI, WR113MI
Setting up different zones with the app
You should simply follow the app tutorial by selecting Multi-zone from the menu. If your Wi-Fi network doesn't cover the whole lawn, measurements might not be precise to the centimeter, as Landroid will approximately calculate distances through wheel revolutions when Wi-Fi is missed. In this case please allow some tolerance in the definition of zones' starting points.
Setting up different zones via Landroid LCD display
First of all you should define the different zones of your garden (from a minimum of 2 up to a maximum of 4); then you can adjust and customise the working time for each one.
Defining each zone and customising working time:
1. Enter the menu by pressing the OK key, move to the "clock icon" with the ↓ down arrow key and press OK to confirm.
2. Use the ↓ down arrow key to select "Customise work area" and press OK to confirm.
3. Press the OK button to enable the number of zones: the number will flash.
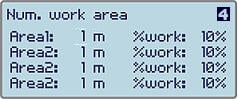
4. Use the ↑up and ↓down arrows to select the number of zones you want, then press OK to confirm.
5. Now press the OK button to enable the first zone: the number will flash.
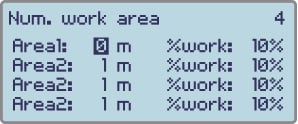
TIP: this measure is the distance between the zone's starting point (mark) and the charging base. For other zones, if enables, the measure you will have to specify is the distance between the starting point and the charging base.
6. Input the distance using the keypad and then press OK to confirm.
7. Now press OK to enable the work time percentage: the number will flash.
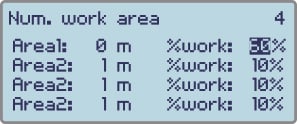
8. Use the ↑up and ↓down arrow buttons to define the correct time percentage, then press OK to confirm.
Articles serie:
- How to set up a Multi-zone
- How to set up Multi-zone on Landroid S 2017/2018 models?
- How to set up Multi-zone on Landroid S, M, L 2019/2023 models?
- How to set up Multi-zone on Landroid M, L 2016/2018 models?